Submitted by florin on
An ATtiny2313 chip, some C code, a bunch of LEDs and other components - that's your DIY Halloween decoration this year. I'll show you how to do it, and there's a video at the end of this page showing the digital creepiness in action.
The project is based on the ATmel 8-bit RISC AVR ATtiny2313 processor. I just needed an excuse to learn how to program it, and a little toy for Halloween seemed perfect for that purpose.
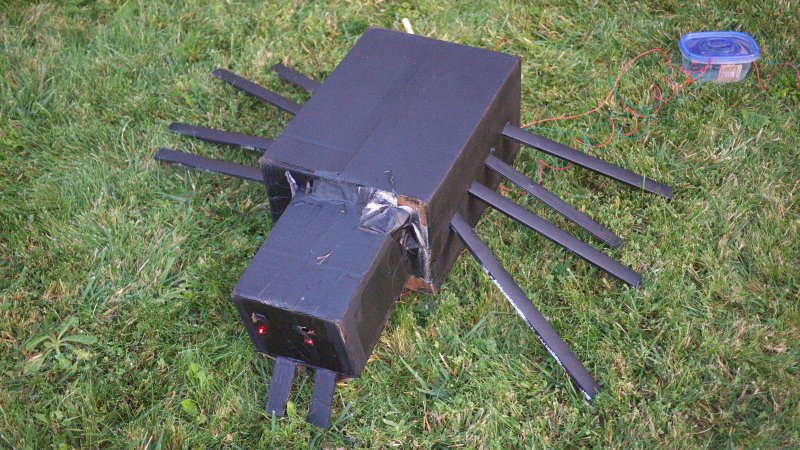
The kids built, out of cardboard boxes, two characters from the Minecraft video game: a spider and a creeper, with eyes made of red LEDs. There were some unintended side-effects, such as when the kids painted the spider using the ultra-flat black Krylon spray which I was saving for optical instruments, instead of using the regular flat black Rust-Oleum. But that's okay, at least the spider looks really really black. :) And I'll have to buy another can of Krylon.

The purpose of the AVR chip was to make the eyes blink - with a twist: the eyes are supposed to blink randomly, as if these were live creatures.
I whipped up a quick driver circuit based on the AVR chip and a few components. You can see the schematics below; nothing fancy, just a simple output stage for each LED pair. The output actually has 5 channels, so it could drive 5 pairs of "eyes" blinking independently, but I only represented 1 channel here, connected to pin 12; the other 4 are identical and are connected to pins 13 ... 16.

And here comes the interesting part, and the whole purpose of this exercise - the C code. Programming an AVR chip is just what you would expect from low-level programming a small RISC processor: it's terse and ugly, but efficient. Programming an Arduino (which is based on an AVR chip) feels much more comfortable by comparison, but doesn't offer access to all the low-level features of the chip. Here, with a "naked" AVR, we can do anything - the hard way. Here's the code I came up with:
#define F_CPU 1000000UL        /* Clock Frequency = 1Mhz */

#include <avr/io.h>
#include <util/delay.h>
#include <stdlib.h>

#define LED_BIT 0

int main(void)
{

    int led[5] = { 1, 1, 1, 1, 1 };
    int decay[5];
    int quant = 10;        // loop pause in ms
    int max_open = 700;        // how many loops
    int min_open = 100;
    int close = 15;
    int i;

    DDRB = 0b00011111;        // these pins are OUTPUT
    PORTB = 0b00011111;    // they all start ON

    for (i = 0; i <= 4; i++) {
    // each pin stays ON a random time
    decay[i] =
        min_open +
        (int) ((double) rand() / ((double) RAND_MAX + 1) * max_open);
    }

    for (;;) {
    for (i = 0; i <= 4; i++) {
        --decay[i];
        if (decay[i] < 0) {
        decay[i] = 0;
        }

        if (decay[i] == 0) {
        switch (led[i]) {
        case 1:
            led[i] = 0;
            decay[i] = close;    // the OFF duration is fixed
            break;
        case 0:
            led[i] = 1;
            decay[i] =
            min_open +
            (int) ((double) rand() /
                   ((double) RAND_MAX + 1) * max_open);
            break;
        }
        }
    }

    PORTB =
        16 * led[4] + 8 * led[3] + 4 * led[2] + 2 * led[1] + led[0];
    _delay_ms(quant);
    }
}
As you can see, we setup Port B for output: first we declare 5 of its bits (pins 12 ... 16) as output, and we initialize them with HIGH level. After that the algorithm is like this:
For each pin, choose a random long duration during which the pin stays HIGH. When that duration has passed, flip the pin to LOW, and keep it LOW a fixed and short duration (the blink). After that, flip it HIGH again. Repeat. At the end of each cycle, dump the 5 bits on Port B, so that the status of the LEDs is actualized.
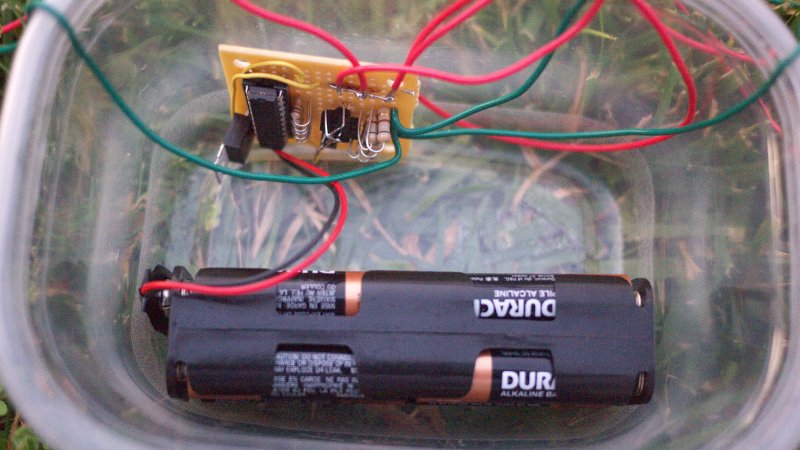
This is the driver circuit, with batteries, in a plastic box (all 5 channels were built, but we only used 3 of them):
This is the whole thing (you'll notice the spider has two sets of eyes):

And here's the result - watch the "creepy" Halloween eyes blink randomly:
Happy Halloween!